A thing I have finished
I’ve been craving a feeling of accomplishment for a long time, and I promise myself that over the Christmas holidays I would make an effort to finish at least one of my personal projects. And I did! And it feels good.
For a while I’ve been needing some bright lights for my macro photography, and also wanting some bright color accent lights. I bought this from ThinkGeek. It has the advantage of simply plugging into a standard light socket, and has sixteen different color settings. I found it still a bit too dim, and some of the colors were off – blue especially looked too purple for me.
So I decided to make my own – a larger one using multiple super-bright LEDs of four colors (red, green, blue and white) arranged in a mosaic with a diffusing filter in front to mix the colors. With this arrangement I should be able to get a much better variety of colors, and using multiple LEDs would give me more brightness.
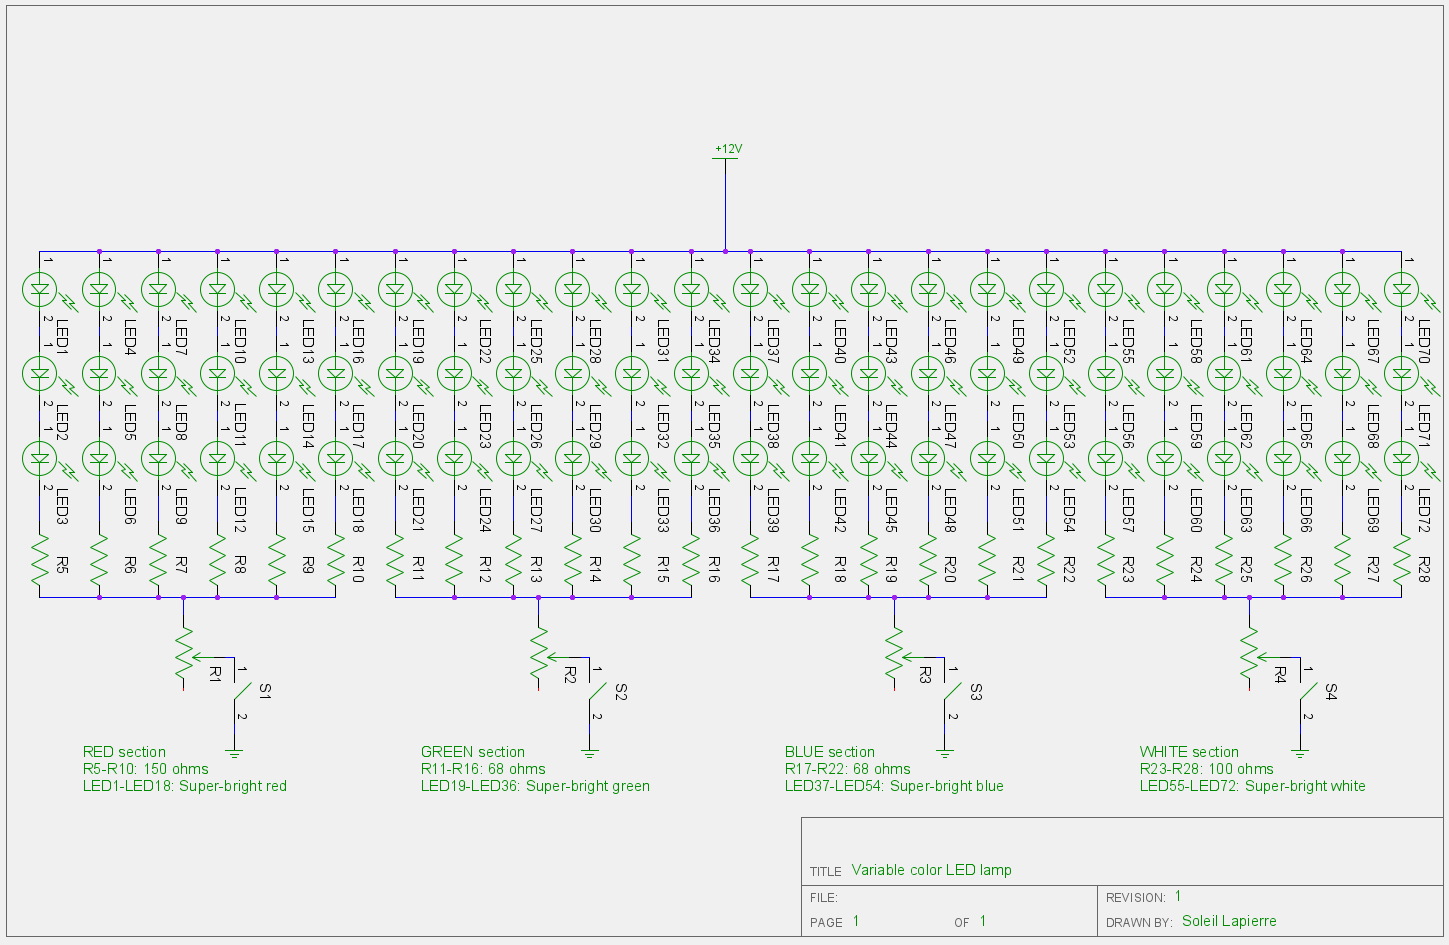
I based the physical design around available enclosures, protoboards and power supplies. I don’t like working with high voltages (they tend to be a bit killey) so I’ll always use an off-the-shelf power supply if I can. I decided on a 12V, 1A supply I had on hand because using a higher voltage would let me place the LEDs more in series, thus reducing the current requirements and the number of current limiting resistors I would need. Most super-bright LEDs have voltage drops between 3V and 4V, so that let me put them in series of three.
Here’s the schematic (click to embiggen):
I decided to socket the LEDs in female header strips instead of soldering them to the protoboard, in case I burnt some of them out and needed to replace them. In practice this perhaps wasn’t such a good idea; it complicated the physical layout of the circuit on the protoboard, and generated problems with loose connections between the LED leads and the sockets. I could probably solve the latter problem well enough by bending the ends of the leads slightly, but it seems to work well enough if I don’t shake it too much, and it’s easy to fix if a connection fails.
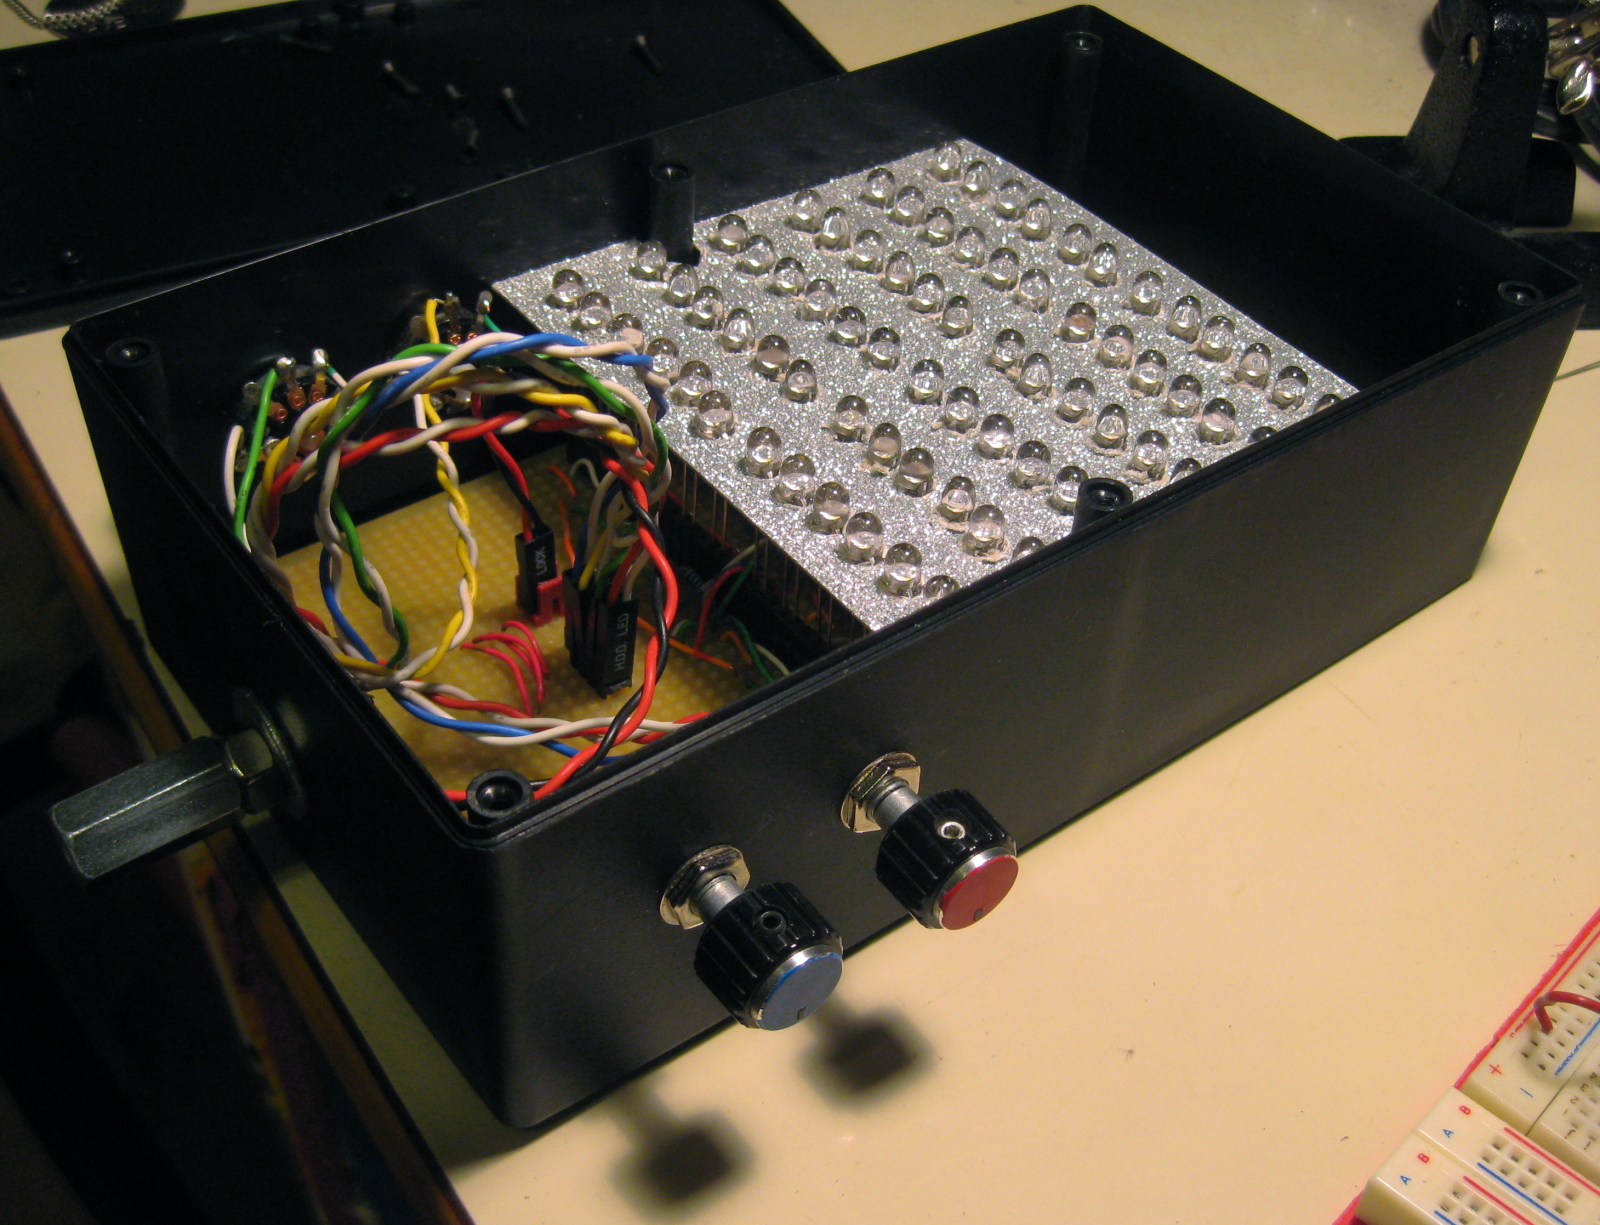
Here’s a picture of the finished board, populated with LEDs, installed in the enclosure I picked for it.

You can see the four brightness control potentiometers installed on the sides. At the bottom is a cheap tripod mount I made with a quarter-inch bolt and bolt joiner.
The next picture shows the reflective, scattering backdrop I put the LEDs through to help blend the colors. Since I was planning to put a diffuser in front of the LEDs, I figured there would be a lot of light back-scattered and so I should put a reflector at the back to stop some of the light from being wasted.
 I also added the color-coded knob handles to the controls in this shot.
And finally, here it is with the diffuser on the front:
 I made the diffuser myself by cutting a thin sheet of clear Perspex to size, then grinding both sides with coarse and then smooth sandpaper. It worked out well.
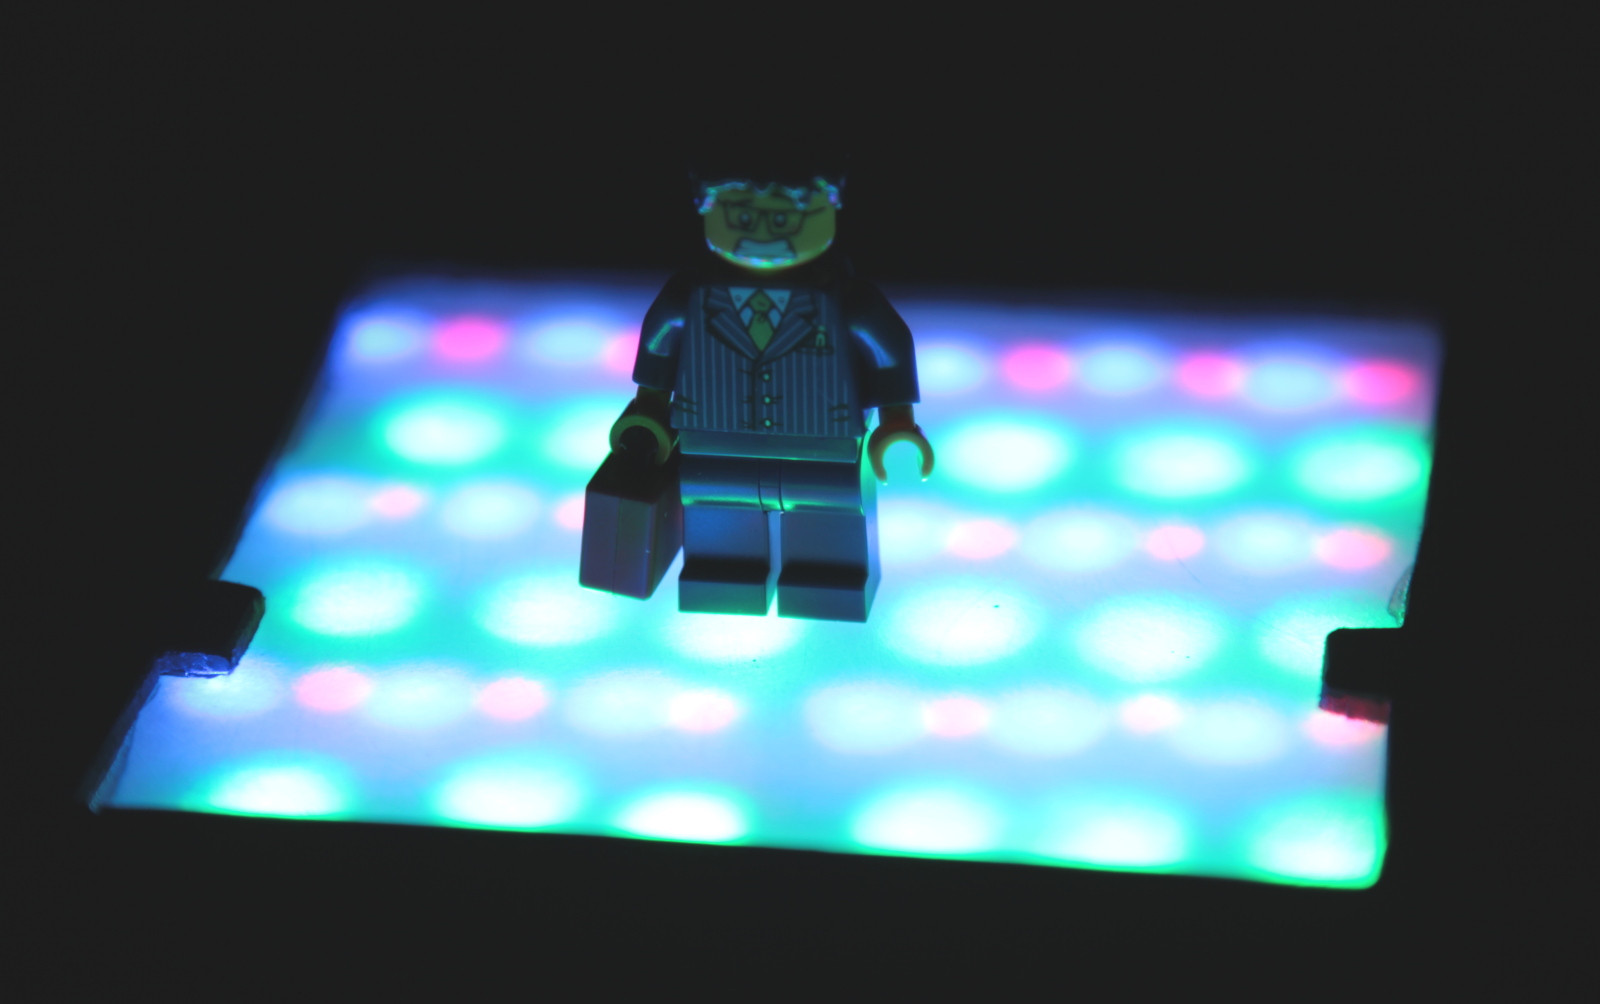
Although I had intended the light to be mounted vertically on top of a tripod or light stand, someone pointed out to me at this point that it could also be used horizontally as a small light table. It kind of looks like a disco floor when used this way:
And now, the results! To see if my project achieved its goals of brighter light and better color than the light I bought from ThinkGeek, I shot the following series of images (click to enlarge please). All images were shot using the same exposure and a fixed color temperature of 5400K. The upper row shows the primary colors of the ThinkGeek light, and the lower row is mine. Mine has an extra photo for white – the dim one is just the white LEDs, and the bright one is with all LEDs on at full intensity.
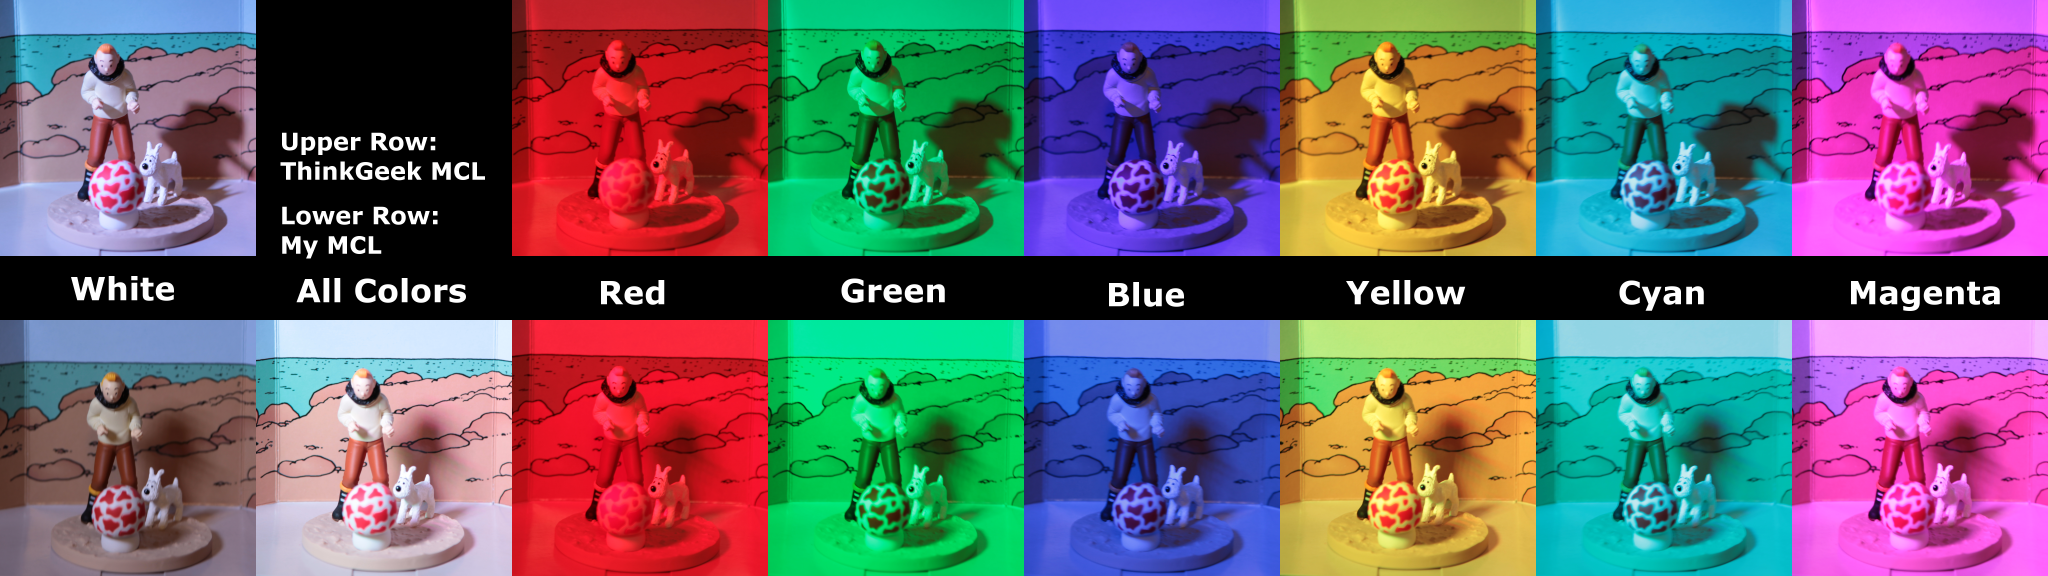
Conclusions:
- Mine is not as much brighter as I had hoped (perhaps half a stop for individual colors) but it is still brighter. The full-on white is considerably brighter.
- Mine has a slightly more bluish blue.
- The diffuser/reflector arrangement worked out well; when used as subject lighting rather than as a light table, the color mixture is very smooth. I could get more brightness by using a clear front panel instead of a diffuser, but then the colors would be less evenly mixed.
- Mine consumes slightly more power (9W versus their 7W) but that’s not a huge difference.
- Mine can produce a much wider variety of colors by virtue of having separate analog brightness controls for each of the four color components.
- Mine produces softer shadows on small objects because the light-emitting surface is relatively large; the ThinkGeek light is almost a point source so gives hard shadows.